
Build guide
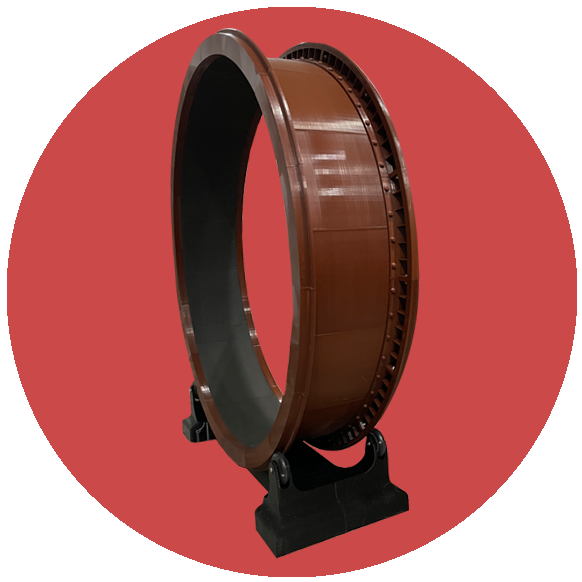
My 3D printed cat wheel
This started as a personal challenge: I made an impulse decision to buy a 3D printer, wanted to learn Fusion 360 by making something useful, and wanted to replace a cat wheel that spun poorly, wobbled, and used unmarked fiberglass rails that tore up my hands. After I posted a video and people started asking to buy the files, I put the STLs up on Cults3D.
These are files for 3D printing — you won't be shipped a wheel. If you purchase the files, you agree not to sell or share them, including the printed wheel itself. Please read the hardware section below before you start; this isn't a cheap project.
Printer used
Ender 3 · 220×220×250mm
Final size
4' wide · 4'4" tall
Filament
~13 spools
Base weight
~4,880g
Infill
15% corners / 10% connectors
Walls · layers
4 walls / 6 top-bottom
You can print this in any color you want. Parts alone run around $100 outside of filament, and how much filament you need depends on your slicer settings — I used a lot of infill to get a heavy, stable wheel, but you can go lighter. I designed the corners to max out an Ender 3's build plate, so this doesn't scale down to a smaller printer, and you can't scale the whole model either since the skate wheels need to fit the base exactly.
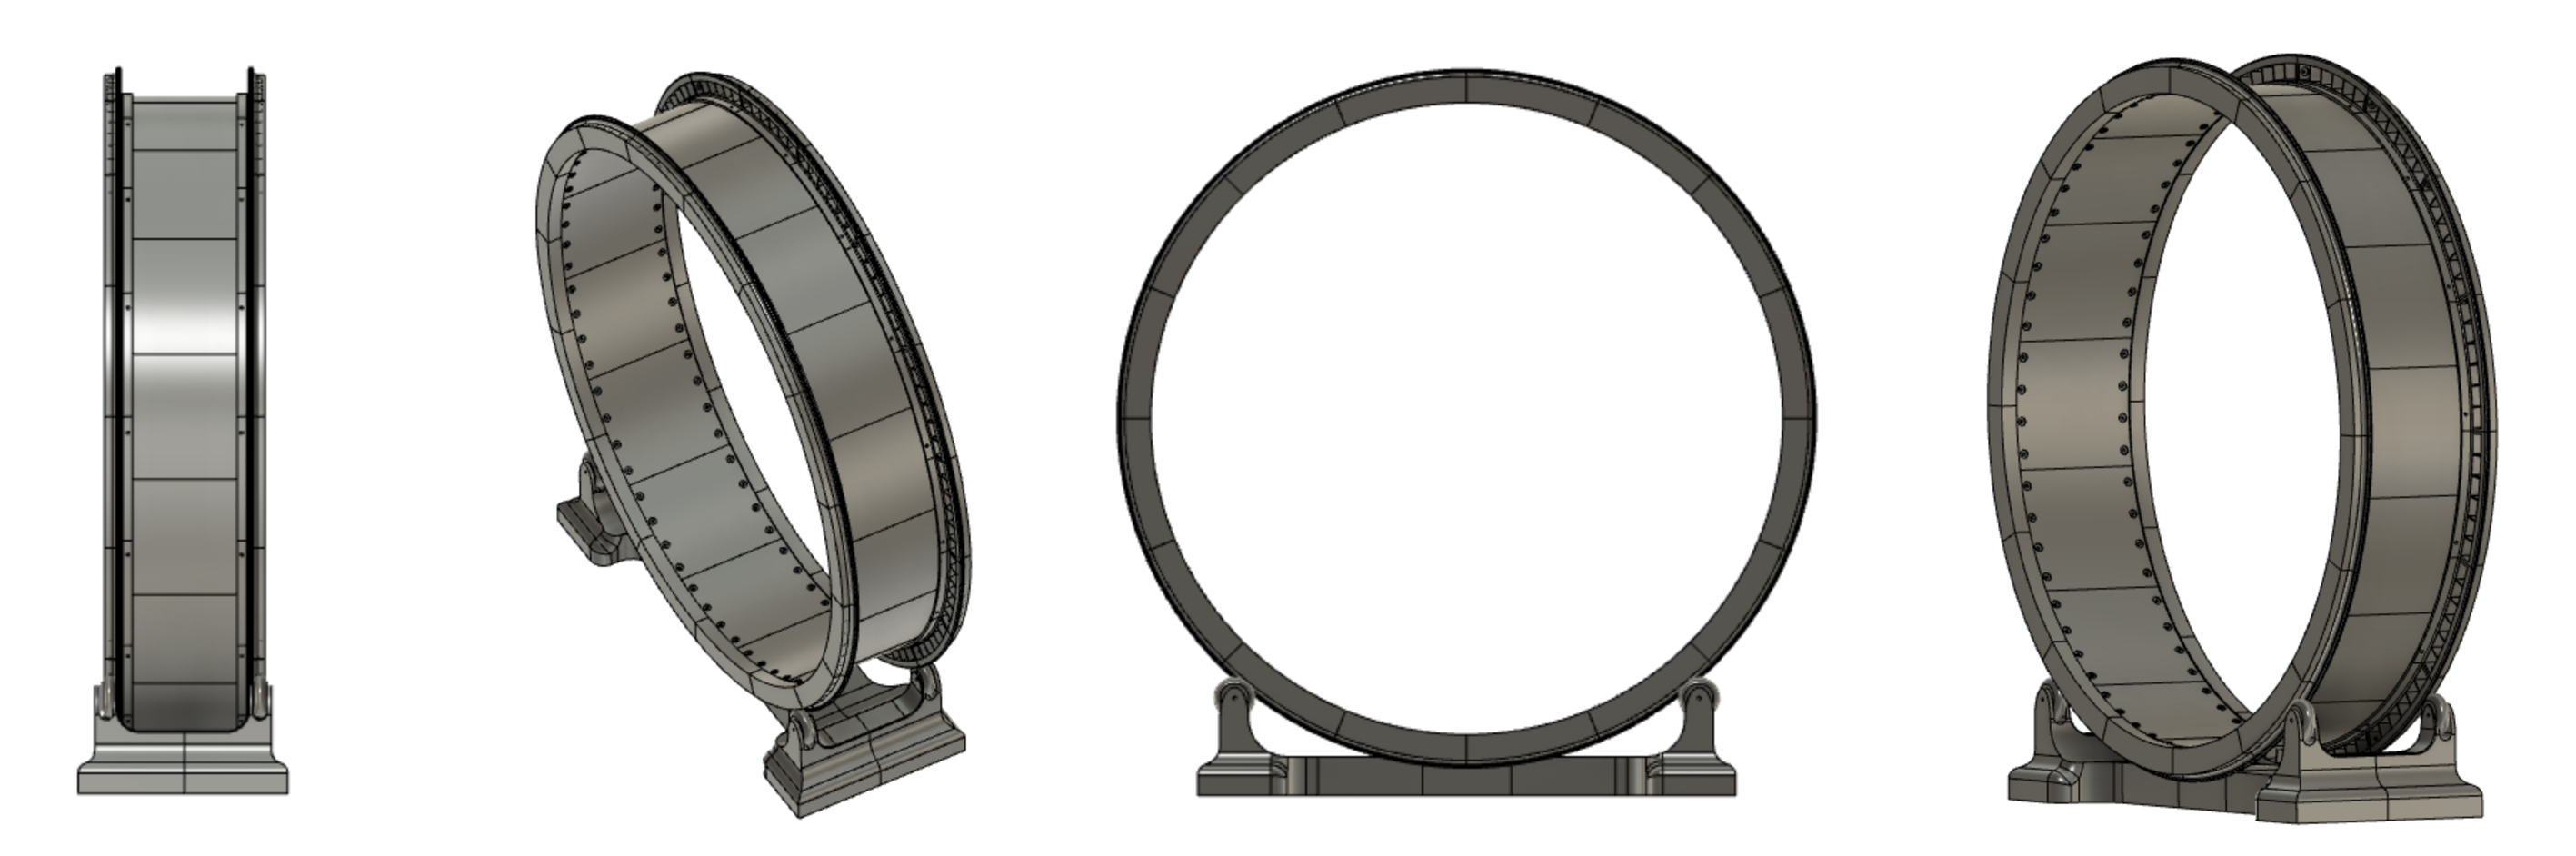
Parts to print
Wheel
- Rails×32
- Walkway×16
- Nuts & bolts (optional)×128 each
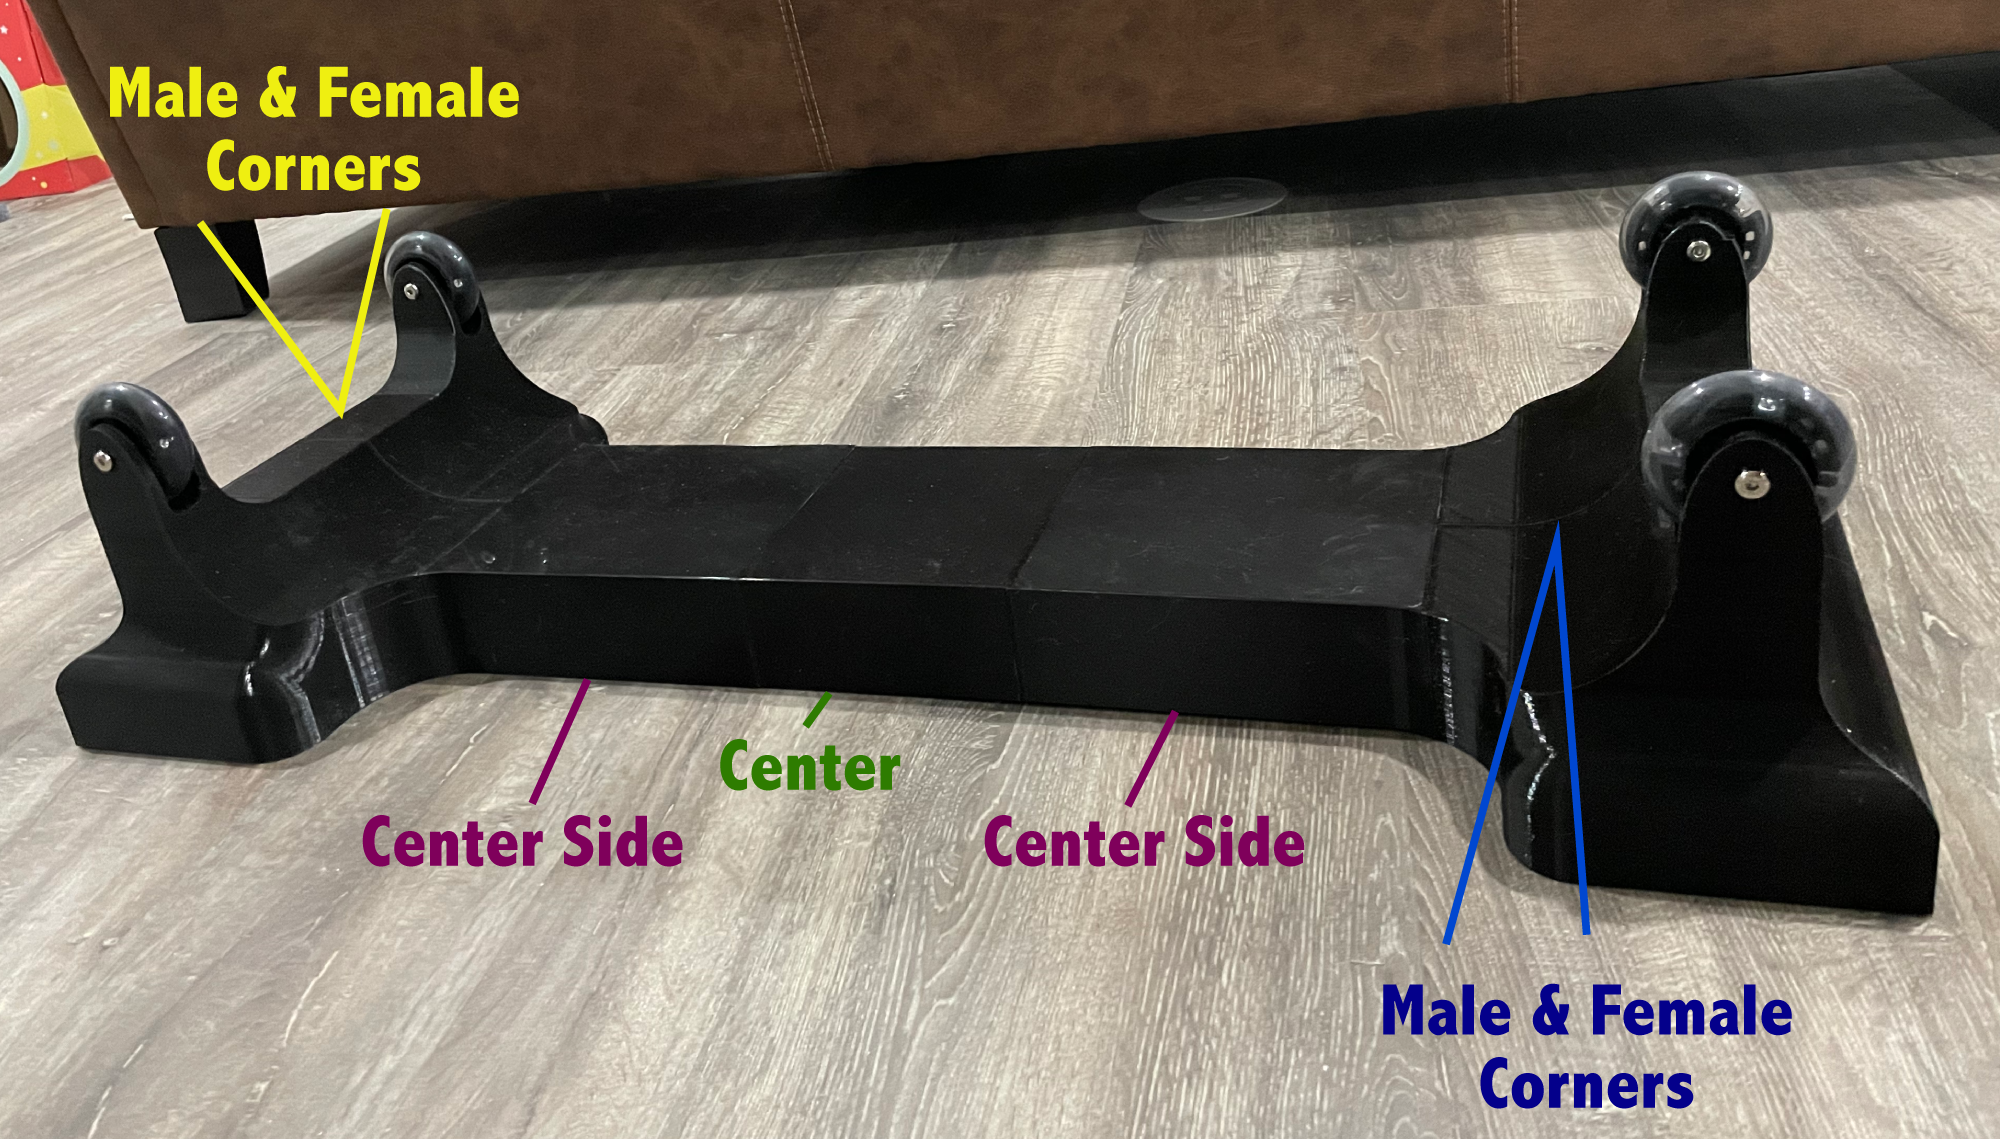
Base
- Female corner×2
- Male corner×2
- Center side×2
- Center×1
Hardware you'll need
-
Wheel shafts — need 4
I used the 40mm shafts; this set comes with washers.
-
Skate wheels — need 4
76×24mm with bearings. I used the light-up ones linked here, but any wheels that size will work.
-
Spacers — need 4
Only needed if your skate wheels don't already come with spacers.
-
Self-adhesive foam sheets, 9"×12" — need 12
Michaels' held up; Hobby Lobby's foam was peeling off by the next morning. Look for a coupon before you buy.
Some links on this page are Amazon affiliate links.
Hardware cost
Rails only, plastic walkway hardware
| Part | Qty | Packs | Price |
|---|---|---|---|
| Zinc pan-head screw, 12-24 × 3/4" | 32 | 1 (100/pk) | $6.10 |
| Steel nylon-insert locknut, 12-24 | 32 | 1 (100/pk) | $6.80 |
| Stainless washer, #12 screw | 64 | 1 (100/pk) | $4.08 |
| Total | $16.98 | ||
Rails + walkway, all metal (recommended)
| Part | Qty | Packs | Price |
|---|---|---|---|
| Zinc pan-head screw, 12-24 × 3/4" | 32 | 1 (100/pk) | $6.10 |
| Steel nylon-insert locknut, 12-24 | 140 | 2 (100/pk) | $6.80 |
| Stainless washer, #12 screw | 192 | 2 (100/pk) | $4.08 |
| Truss-head screw, 12-24 × 5/8" | 128 | 3 (50/pk) | $11.23 |
| Total | $61.55 | ||
Prices are from McMaster-Carr, updated August 2026, excluding tax and shipping.
Assembly
-
1
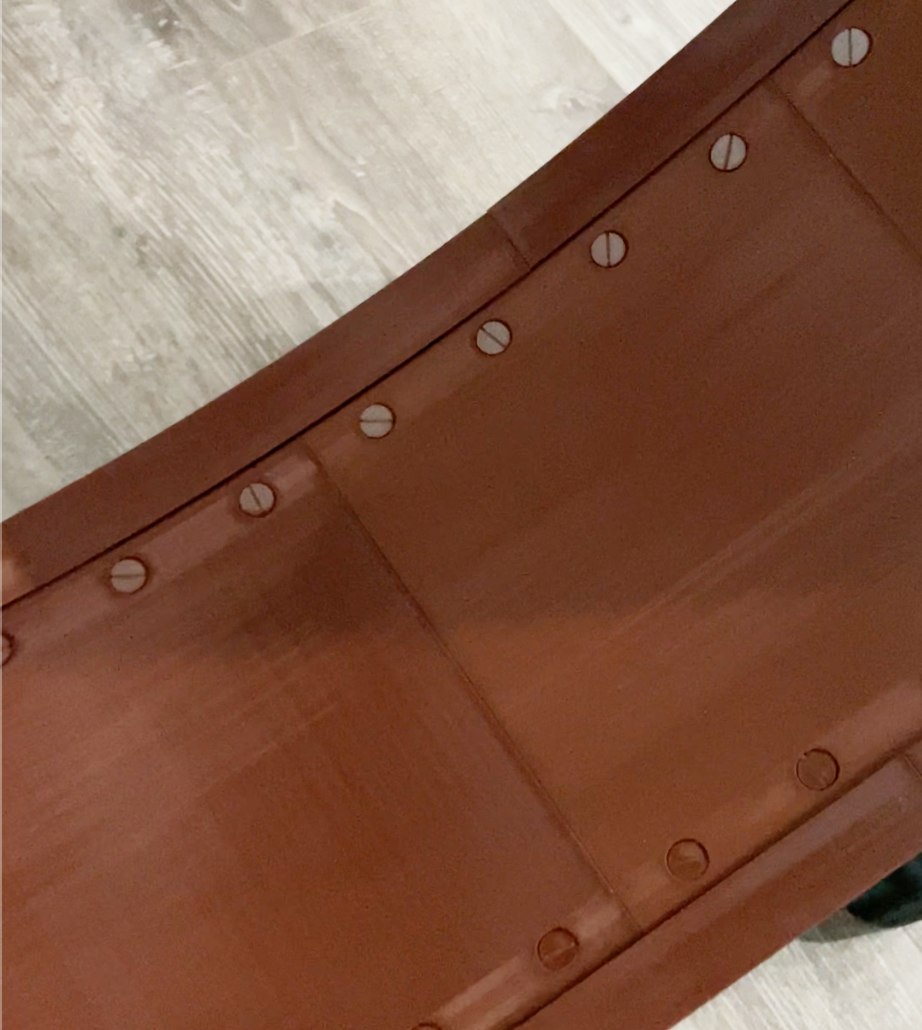
Connect the walkway pieces to the rails with plastic screws first — it gets harder once the metal rail hardware is tight. Offset the walkway from the rails by two holes.
-
2
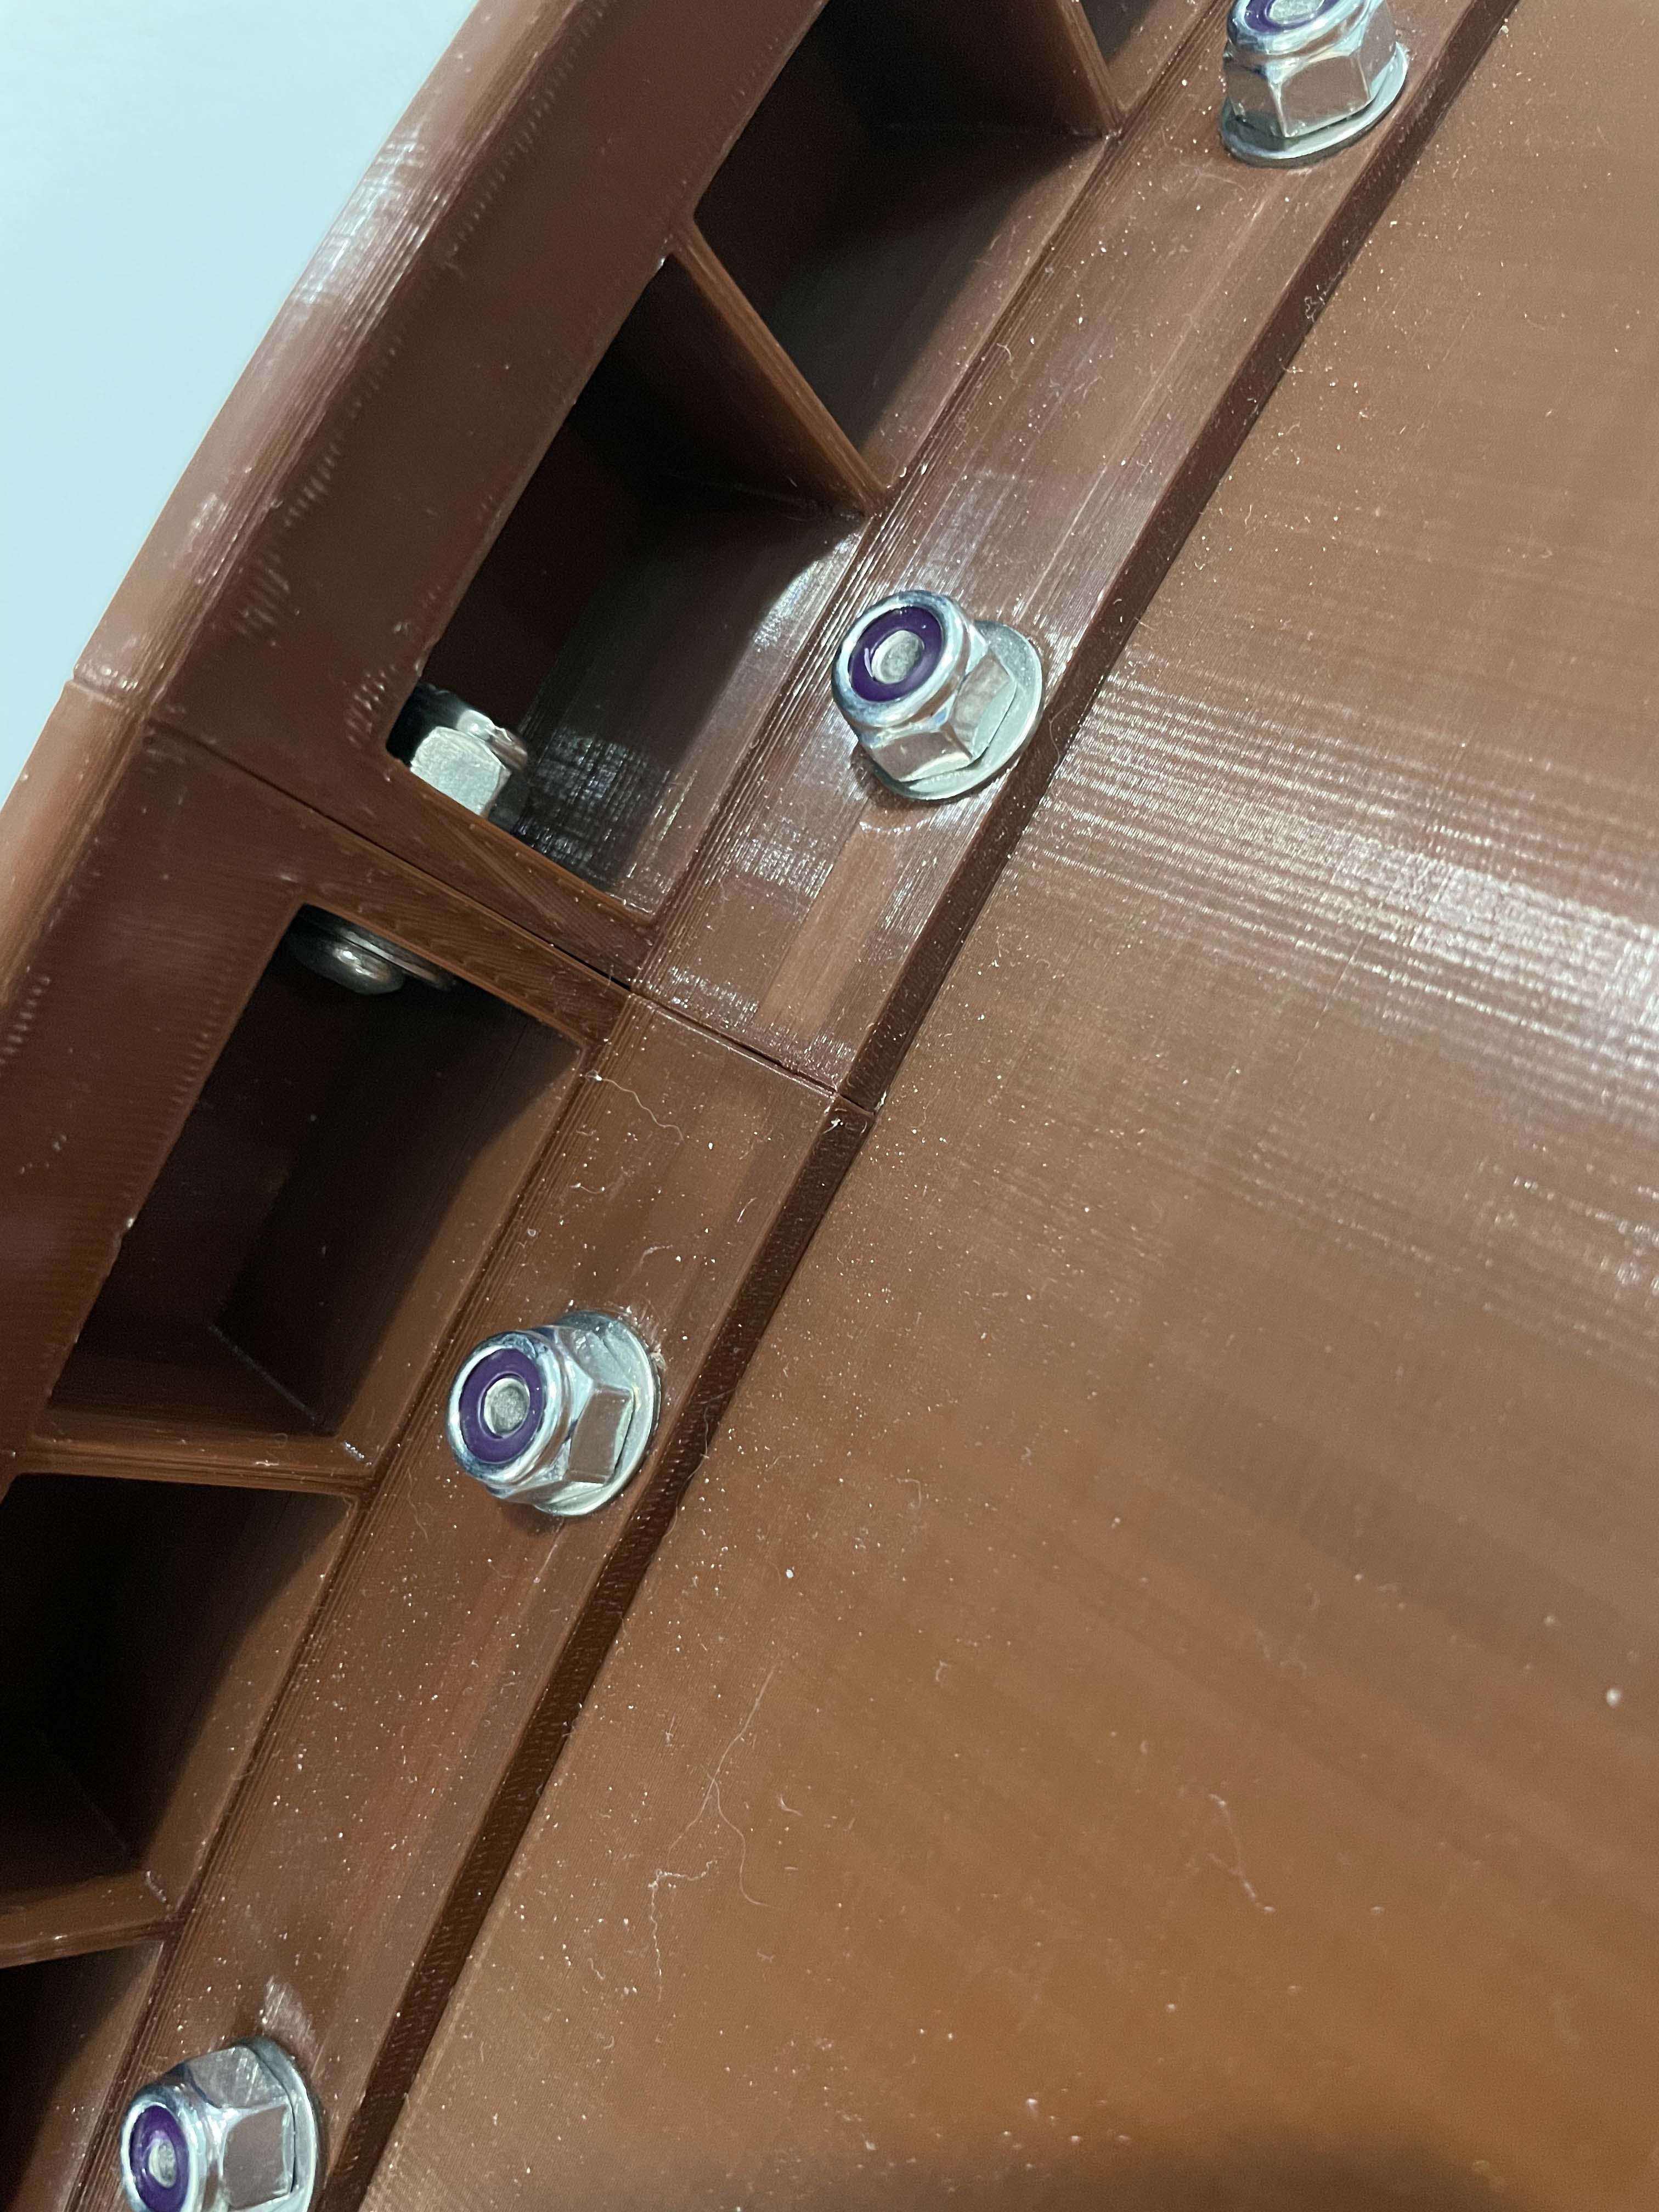
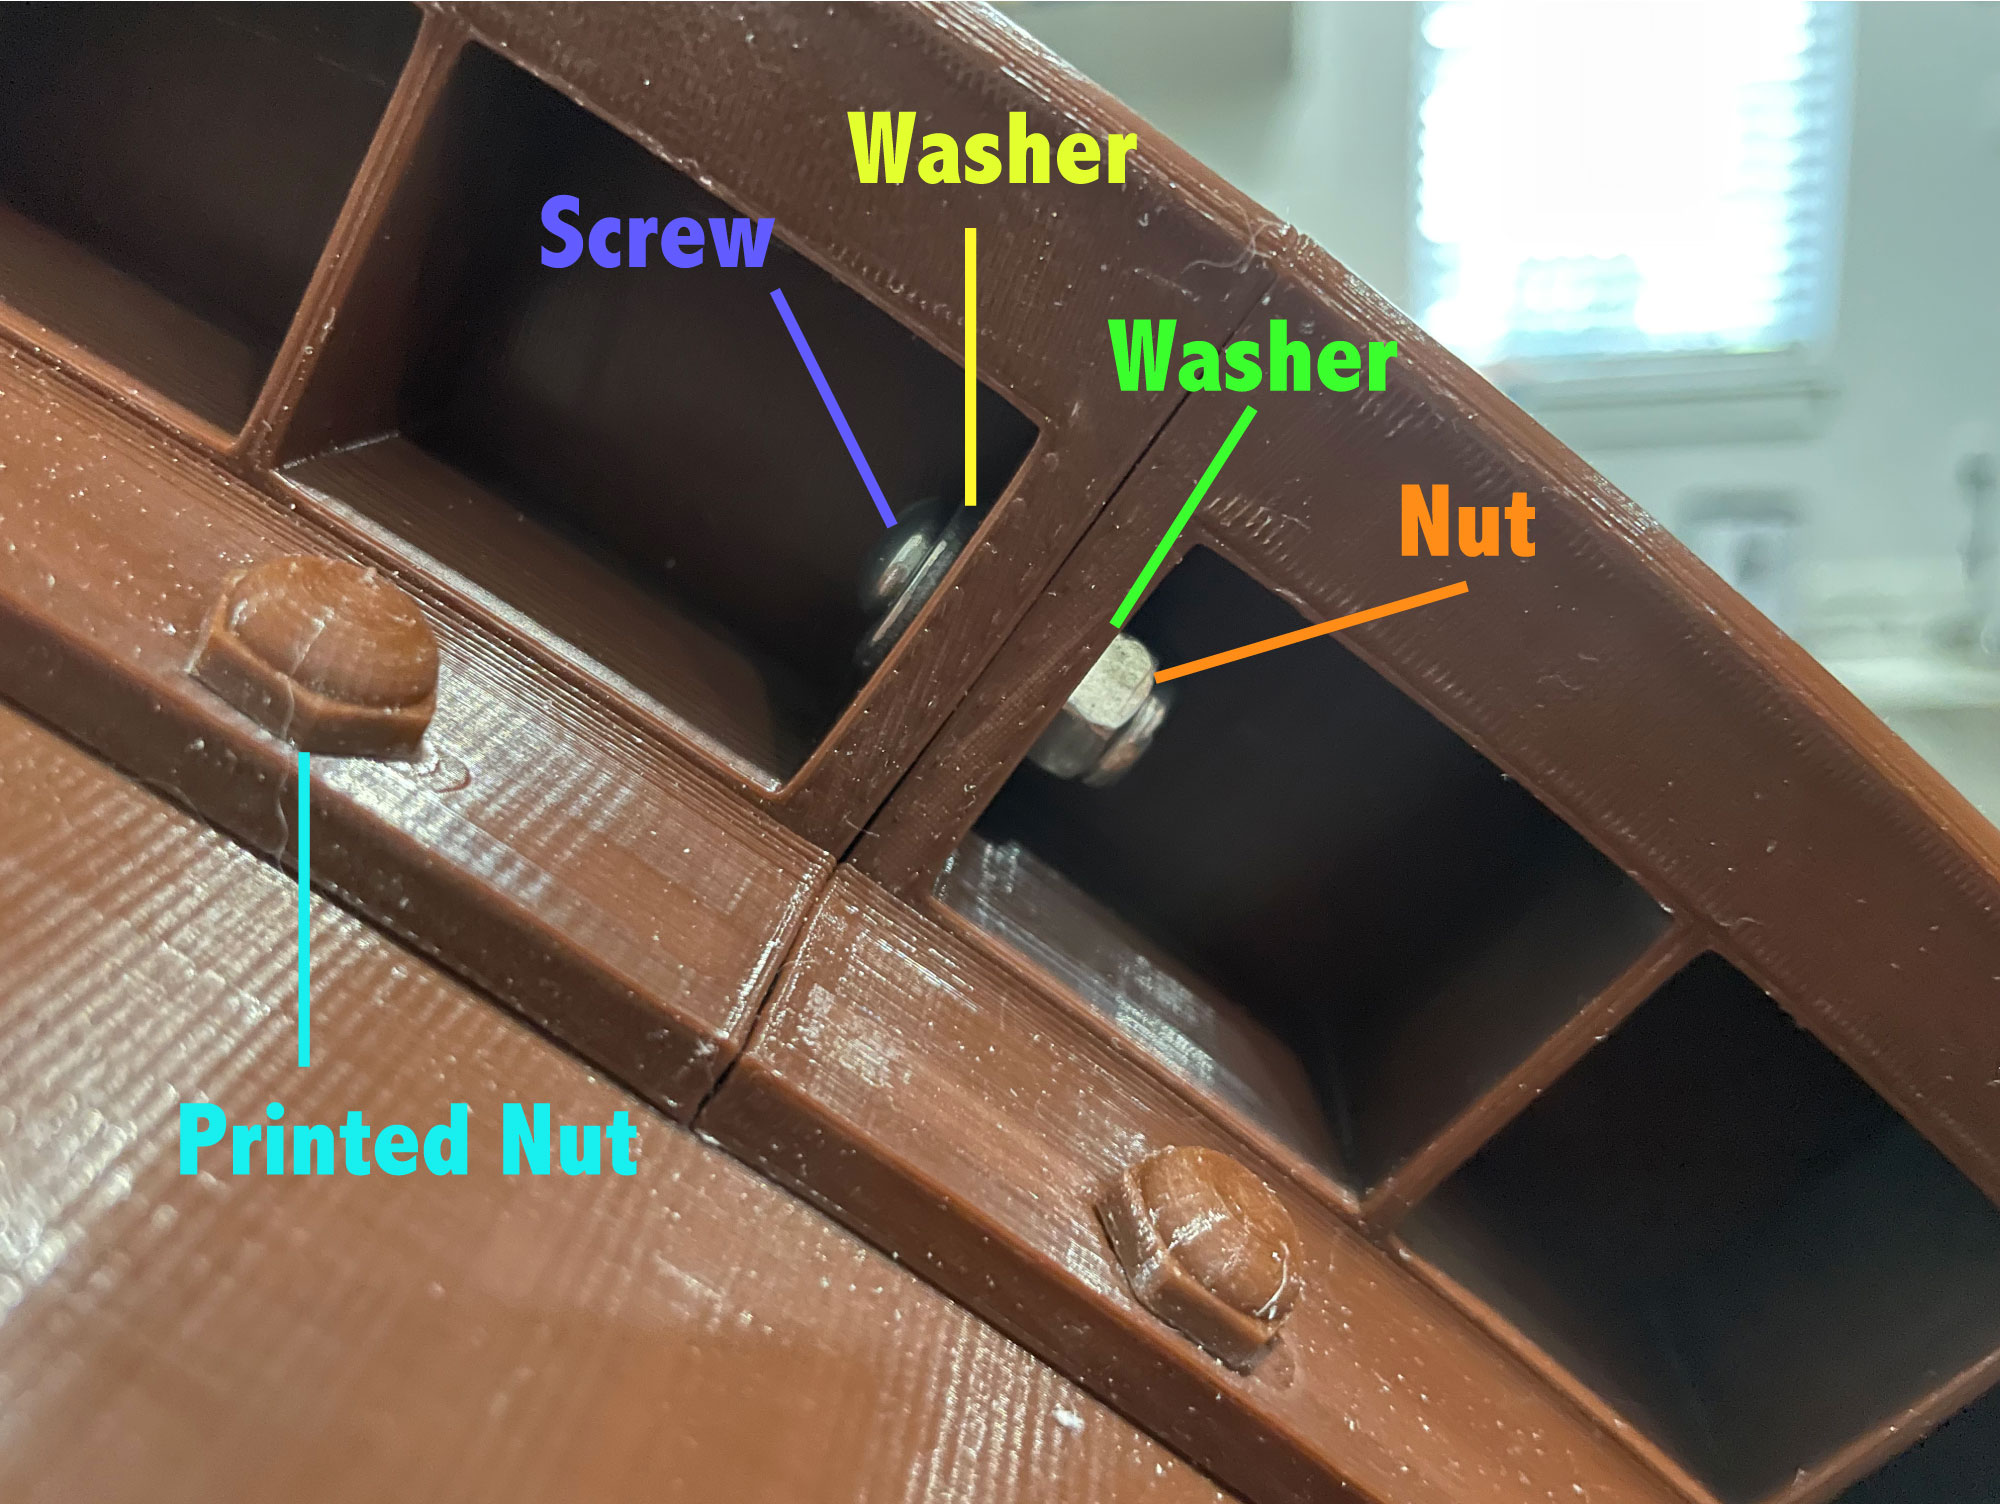
Connect all the rails with the metal fasteners, loose at first. Once every piece is in, snug them up — a ratchet and Allen wrench made this easy. If you're using metal screws, only one washer goes under the nut.
-
3
Once assembled, add a dot of super glue under the printed nuts on the walkway as insurance. Skip this if you upgraded to metal hardware there.
-
4
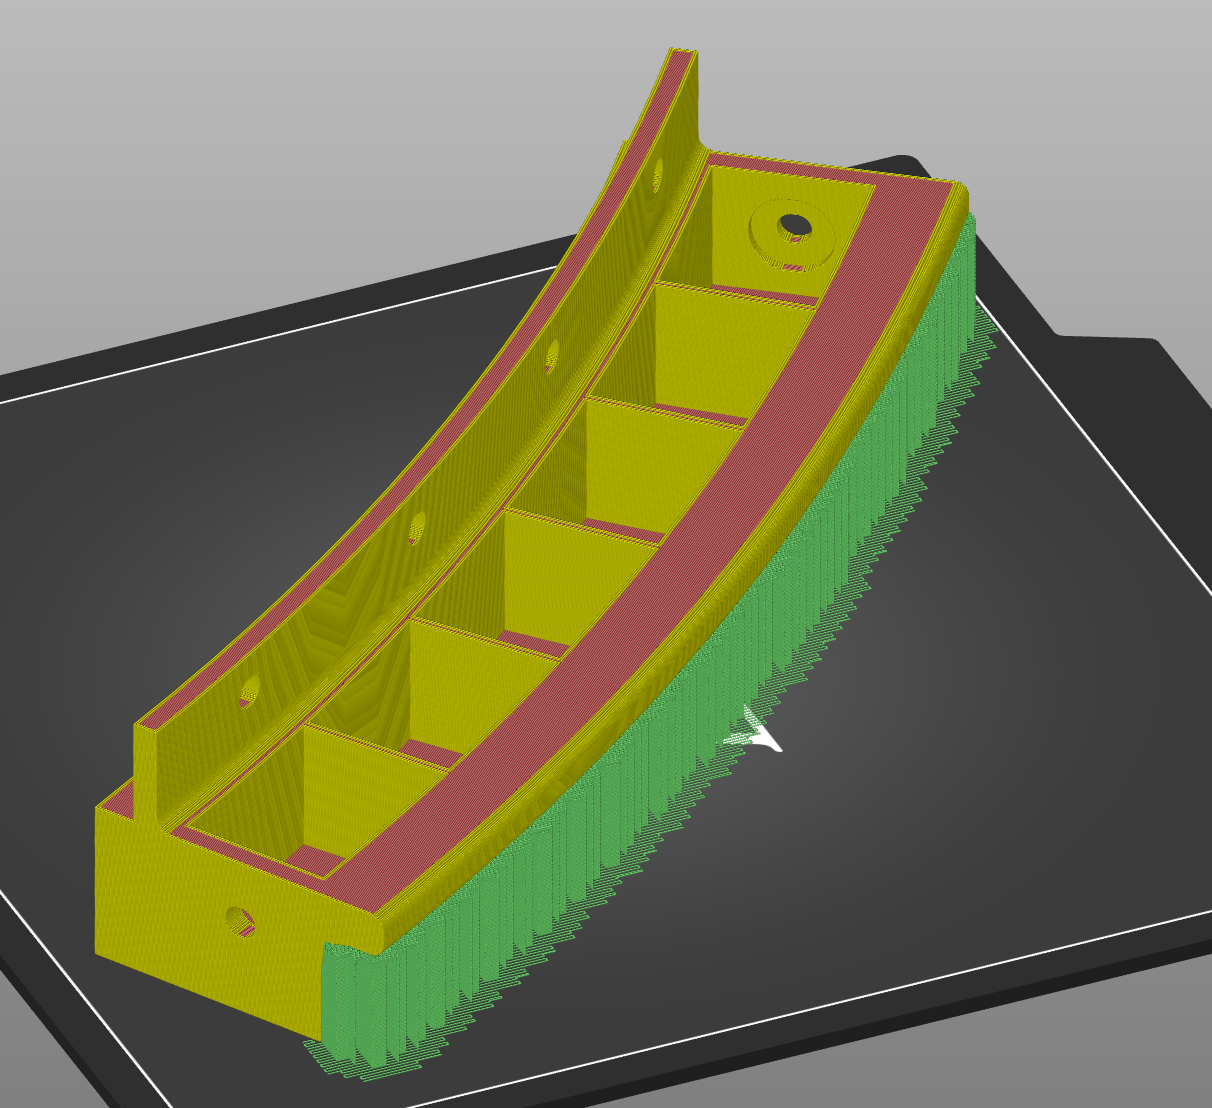
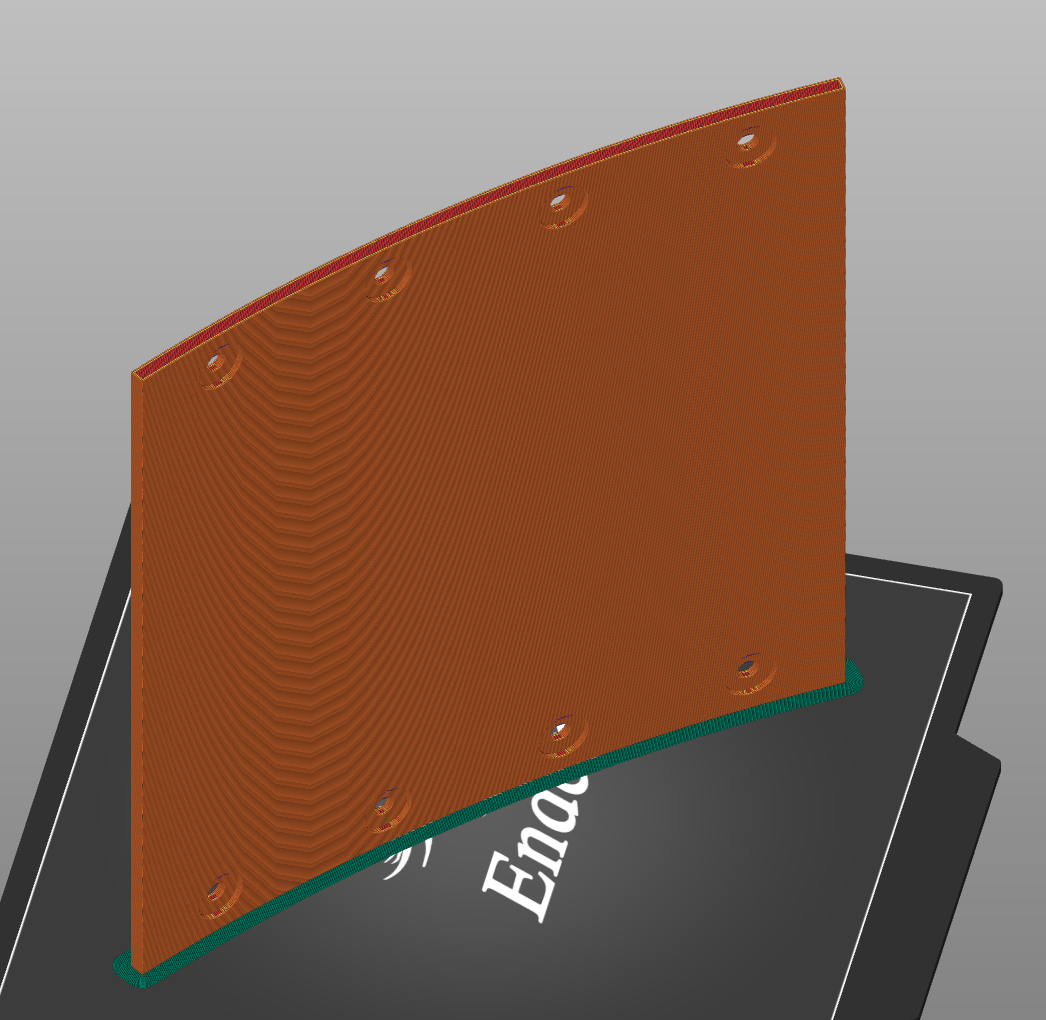
Print rails with the large flat surface on the plate; the overhang needs supports, and you'll likely need to sand where they were. Print the walkway pieces standing on their side, with a brim.
-
5
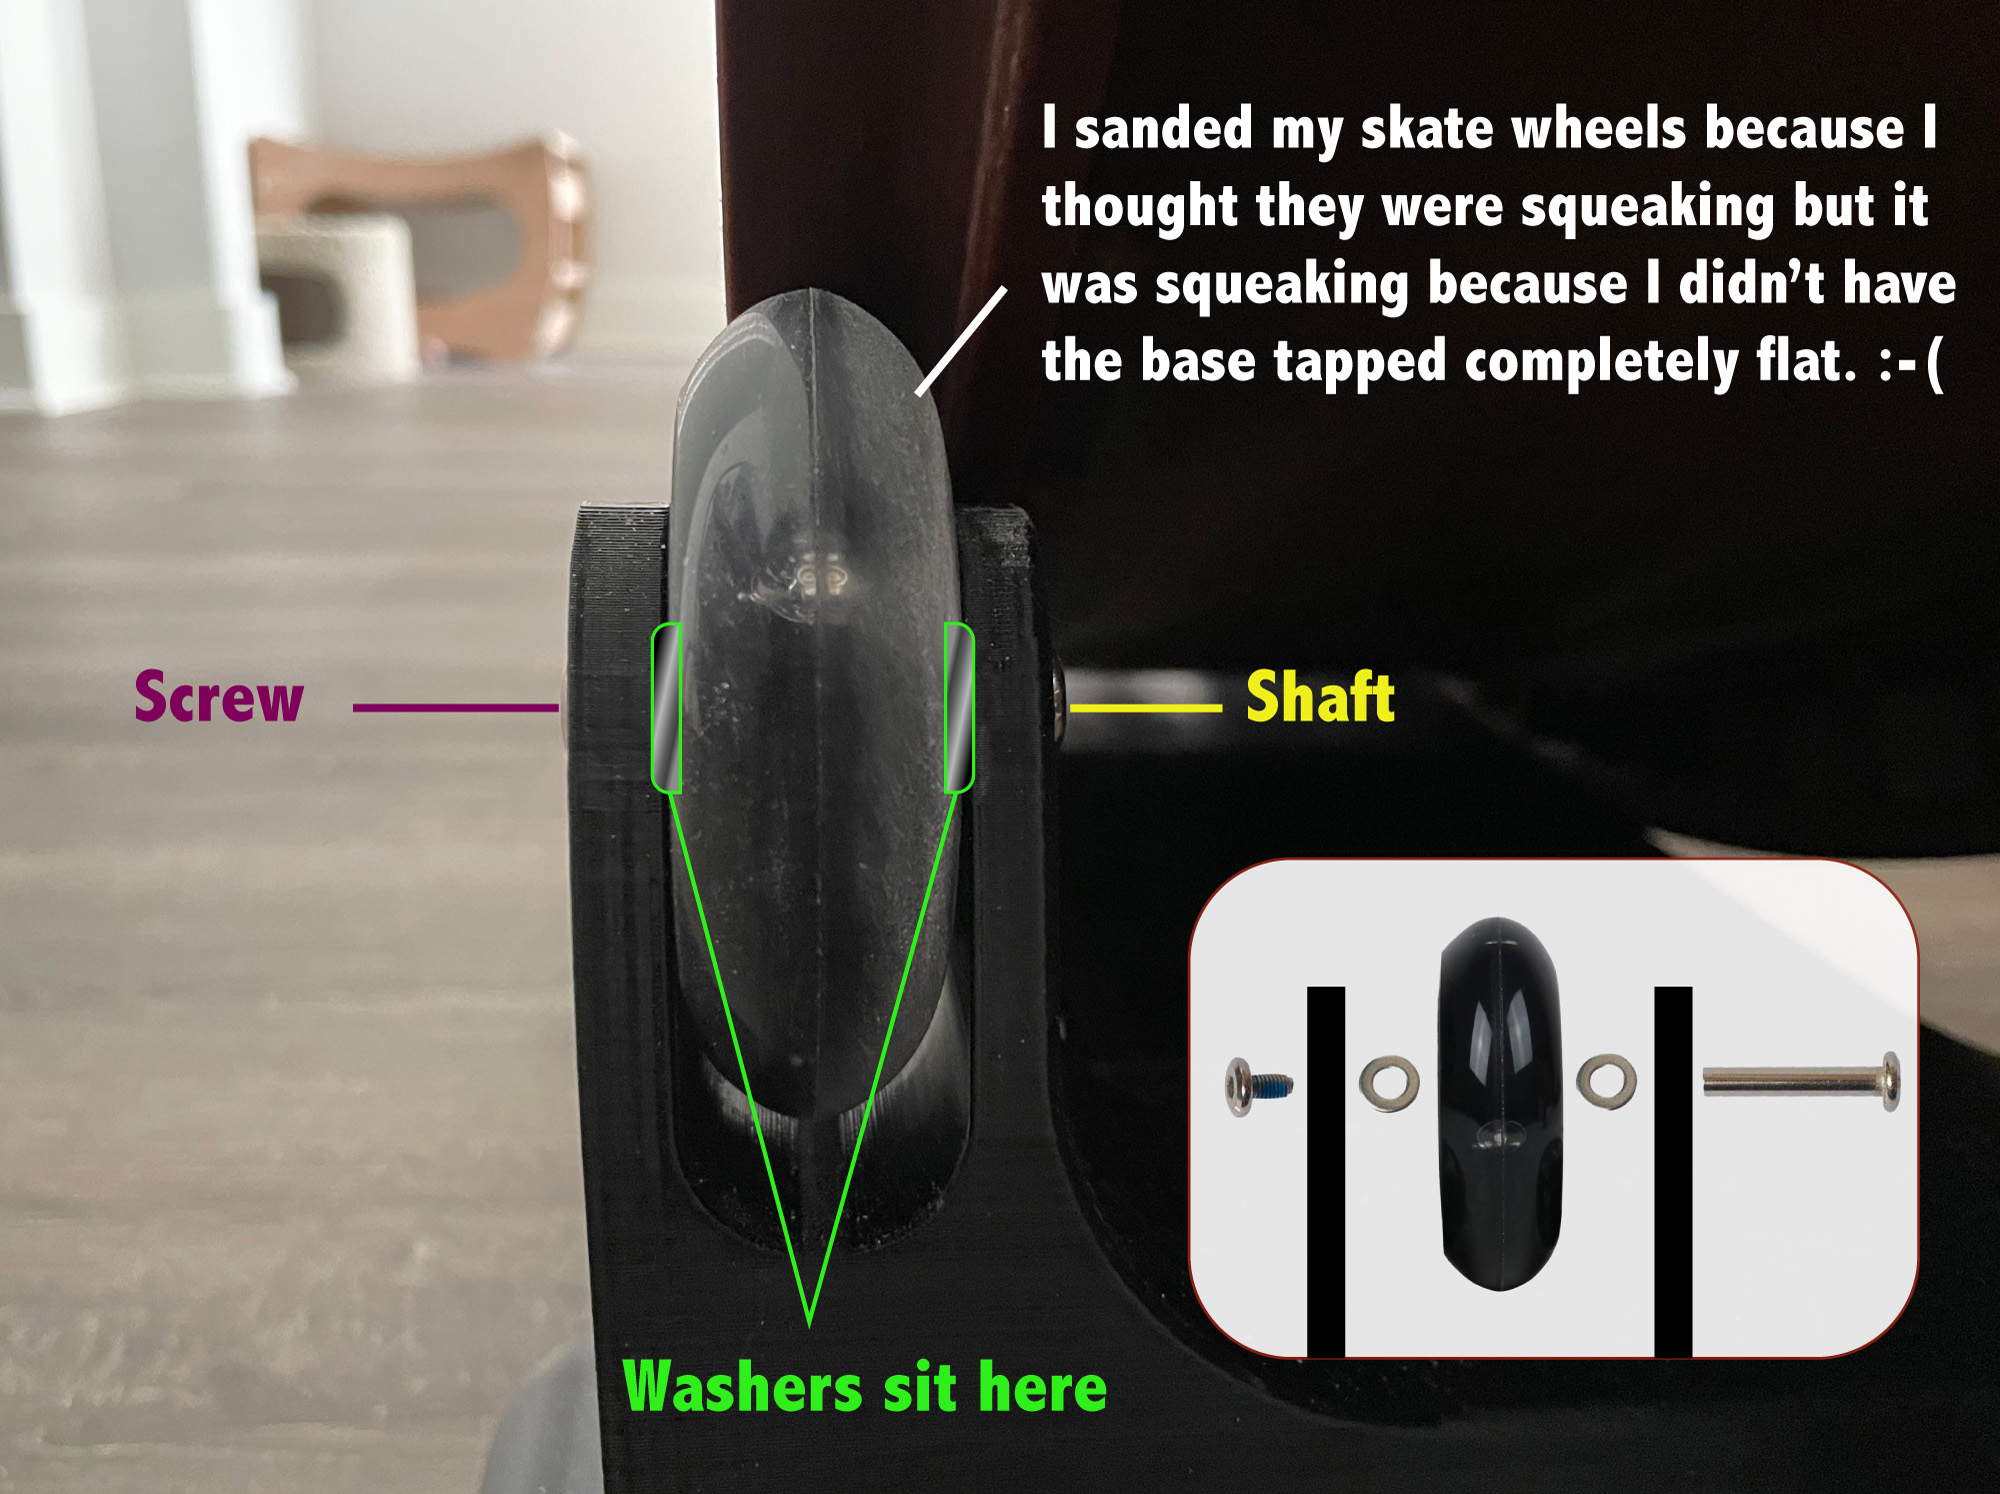
Before assembling the base, do the roller-blade wheel assembly: feed the shaft through both holes, add a washer with the rough side against the skate wheel, work the skate wheel on, add the second washer, push the shaft the rest of the way through, then attach the screw. It's a tight fit by design — a screwdriver gently flexing the plastic apart helps.
-
6
The base needs no fasteners or glue — the pieces fit together snugly, tapped into place with a rubber mallet. Print the female corner and the center-side pieces with supports (or print center-side upside down to skip supports and flip it during assembly).

Community wheels
Seeing other people's printed wheels never stops being exciting — here are a few: